This recipe is based of the Strawberry Jam Tarts recipe- from The English Kitchen Blog. Here are my few changes to the ingredients but the instructions are basically the same.
Blackberry Jam Tarts
Makes 12
For the Pastry:
4 ounces plain flour
pinch of salt
2 ounces butter
1 TBS sour cream
2 TBS cold water
For the Tarts:
About half a jar of your favourite type of jam in this case I used Blackberry Jam just the Coles home brand which was really good.
 |
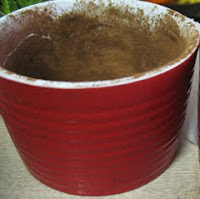
| The Tools needed |
First make the pastry.
- Sift the flour and salt into a bowl. Rub together the butter and then add this to the flour with the sour cream
- Rub this into the flour using the tips of your fingers, lifting it up as you go to aerate the flour somewhat. Rub in lightly until the mixture is crumbly. Don't over mix. Add the cold water all at once and stir with a fork. Blend quickly until the mixture clings together in a ball, leaving the sides of the bowl clean.
- Turn the dough out onto a lightly floured surface and knead a couple of times, lightly, to make smooth stiff dough. Let rest for 10 minutes before using.
- Preheat the oven to 200*C/400*F/gas mark 6 and lightly grease your trays.
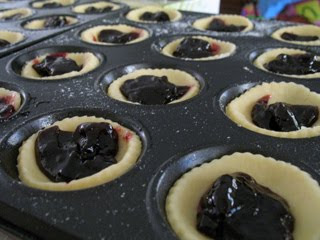
- Roll the pastry out to 1/4 inch thickness. Cut into rounds with a sharp 3 inch fluted cutter. Place the pastry rounds into a 12 hole bun tin. Dollop heaped teaspoons of jam into the centres of each.
 |
| The Jam Tarts ready to be popped in the oven |
- Bake for 12 to 15 minutes, until the pastry has crisped nicely and the jam is bubbling Remove from the oven and allow it to cool before eating or serving. (Try to be patient hot jam can burn your mouth pretty badly!!!)
 |
| All Golden and Delicious ready to be eaten |
Chocolate Peanut butter Cupcakes
Ingredients
Cupcakes
- 200g dark chocolate (70% cocoa)
- 1/2 cup (75g) chocolate chips
- 1 cup (250ml) sour cream
- 125g butter, softened
- 1 ½ cups (225g) brown sugar
- 3 eggs
- 1 ½ cups (225g) self-raising flour
- ½ cup (75g) plain flour
- ¼ cup (30g) cocoa powder
- ¼ cup (60ml) milk
- 1 tsp vanilla essence
- 1 tbsp sherry (optional)
Peanut Butter Frosting
- 5 ounces (140g)cream cheese, at room temperature
- 2 ounces (50g)( unsalted butter, at room temperature
- 1 cup (125g) (8oz) confectioners’ sugar, sifted
- 1/2 cup (150 g) peanut butter, preferably a commercial brand (because oil doesn’t separate out)
- 1 tsp vanilla essence
- 1tbsp brewed coffee
Chocolate Drizzle
· 4 ounces (115g) semisweet chocolate, coarsely chopped
· ½ tbsp (30g) peanut butter (optional)
· 1½ ounces butter (45g)
· 1 tbsp sherry (optional)
· 1 tbsp brewed coffee
1. Preheat oven to 160°C. Line two 12 capacity muffin pans with paper cases.
2. Combine the chocolate sour cream and milk in a small saucepan over low heat. Cook whilst stirring, for 5 minutes or until chocolate melts and mixture is smooth. Remove from heat and set aside to cool.
3. Use an electric mixer to beat the butter and sugar until pale and creamy. Add the eggs, one at a time, beating well between each addition, until just combined. Stir in the vanilla essence.
4. Add the flours and cocoa powder and stir until just combined. Add the melted chocolate mixture and stir to combine. Fold in the chocolate chips and spoon evenly among the lined muffin pans.
 |
| Pre baked cupcakes |
5. Bake in preheated oven for 20 minutes or until a skewer inserted in the centre comes out clean. Remove from oven and transfer to a wire rack to cool.
 |
| Cupcakes straight out of the Oven |
Peanut Butter Icing Method
1. In a large bowl with an electric mixer, beat the cream cheese and butter until light and fluffy. Gradually add the confectioners’ sugar 1 cup at a time, mixing thoroughly after each addition and scraping down the sides of the bowl often. Continue to beat on medium speed until light and fluffy, (roughly 2 to 3 minutes).
2. Add the peanut butter and beat until thoroughly blended, then add the dissolved coffee and vanilla essence and give it a good stir.
3. Icing the cupcakes once they have cooled completely
 |
| Peanut-butter Frosting |
Method for Chocolate Drizzle
1. In the top of a double boiler or in a bowl set over simmering water, combine the chocolate, peanut butter and butter. Cook, whisking often, until the chocolate is melted and the mixture is smooth. Stir in the brewed coffee (or if your feeling lazy 1 tsp of the fine instant coffee would do the trick) and sherry.
2. Use while still warm to drizzle on cupcakes
 |
| Taa daahh..enjoy |
After Thoughts
- The best way to get the batter into the cases is by using an ice cream scoop. Try it if you haven’t before - it really is a time saver.
- When drizzling the chocolate I first laid out some newspaper on the counter and placed the cupcakes on it - the drizzling bit can get a bit messy, well the way I do it anyway.
- As hard as it is to be patient make sure the cupcakes have cooled completely before you start to icing them, else the icing will start to sweat.
- With the brewed coffee add as little or much of it as you like , I always end up making a bit extra and I usually don’t use it all
I am pretty sure I am not the only one who as been drawn into the hypnotic trance of MasterChef Australia, and after seeing them make these yummy chocolate fondants I had to give it a try.I did only make half the recipe though because, as much as I love chocolate, I did not want to be eating them for a week.
This is how I broke it down, making 4 decent size fondants. I also made an orange/ginger cream to serve with it instead of the Amaretto
milkshake they made on the show.For the original recipe, go to the MasterChef Australia website
Ingredients
Melted butter, for greasing
Cocoa powder, for dusting
100g dark couverture chocolate
100g butter, chopped
2 eggs
2 egg yolks
50g caster sugar
100g plain flour, sifted
50g butter, extra - for greasing the Ramekins
50g cocoa powder- For coating the buttered Ramekins
Cocoa powder, for dusting
100g dark couverture chocolate
100g butter, chopped
2 eggs
2 egg yolks
50g caster sugar
100g plain flour, sifted
50g butter, extra - for greasing the Ramekins
50g cocoa powder- For coating the buttered Ramekins
Orange/Ginger Cream
250ml cream
2Tblsp caster sugar
Rind from 1 orange
1 tsp orange essence
6 pieces candied ginger chopped up
Method
 |
| Prepared Ramekin |
Step 1: For the fondant, preheat oven to 180°C. Place a small square of paper in the bottom of 4 large ramekins and grease with melted butter and cocoa powder. Place ramekins on a baking tray.
Step 2: Melt the chocolate and butter in a bowl over a small saucepan of boiling water, turn off heat. In an electric mixer, add the eggs, egg yolks and sugar and mix on high speed until fluffy and white. Tip chocolate mixture into a large bowl, pour egg mixture into chocolate mixture and fold together. Fold in flour and mix until smooth. Spoon or pour mixture into ramekins and place in fridge until ready to serve. When ready to serve, bake in oven for 9-10 minutes.
Step 3: In a large bowl, whip the cream until stiff peaks are just about to form. Beat in orange essence and sugar until stiff peaks form. Fold in the chopped candied ginger and orange rind just before serving .
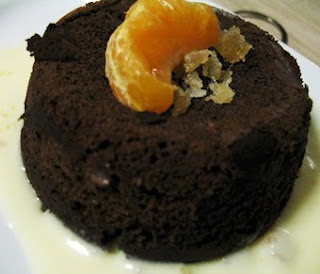
Step 4: To serve, gently run knife along outside of each ramekin and turn fondant out into serving plates and place the orange/ginger cream around the fondant and serve with a few chopped pieces of crystallized candied ginger sprinkled on top.
After Thoughts
- The tip to put the little greased square paper at the bottom of the ramekin was brilliant and made getting the fondant out so much easier!
- I actually used brown suger instead of caster suger , I like the caramel like flavour it adds to the recipe.I really should have whipped the cream properly before adding the essence.
- The chocolate fondant was delicious and not as hard as I thought it would be, I will definitely be making them again.
Ricotta Lemon and Honey Cookies
Why ricotta cookies and not some fabulous intense chocolate sensation? Well, quite frankly I had ricotta sitting in my fridge which had an expiry date rapidly approaching, and so, based on
Giada De Laurentii’s Lemon Ricotta recipe, I made my own, little variation, that resulted in a soft, almost cake-like cookie which are perfect with afternoon tea.
Giada De Laurentii’s Lemon Ricotta recipe, I made my own, little variation, that resulted in a soft, almost cake-like cookie which are perfect with afternoon tea.
Makes about 10 large cookies
Ingredients
- 1 ½ cups all-purpose flour
- ½ teaspoon baking powder
- ½ teaspoon salt
- 2 ½ oz unsalted butter
- ½ cup dark brown sugar
- ½ cup honey
- ½ cup roasted chopped cashew nuts (leave out if allergic)
- 1 egg
- 250g container whole milk ricotta cheese
- 2 tablespoons lemon juice
- ½ tsp vanilla essence
- 1 Tblsn lemon, zest
Icing:
- 1 ½ cups powdered sugar
- 3 tablespoons lemon juice
- 1 tablespoons honey
- 1 lemon, zested
Directions
Preheat the oven to 170 degrees C.
In a medium bowl combine the flour, baking powder, and salt. Set aside.
In a large bowl combine the butter and the sugar. Using an electric mixer beat the butter and sugar until light and fluffy, (roughly 3 minutes). Add the egg , beat until incorporated. Add the ricotta cheese, honey, lemon juice, and lemon zest. Beat to combine. Stir in the dry ingredients. Fold in the chopped roasted cashew nuts .In a medium bowl combine the flour, baking powder, and salt. Set aside.
Line 2 baking sheets with parchment paper. Spoon the dough (about 1 tablespoon for each cookie) onto the baking sheets. Bake for 15 minutes, until slightly golden at the edges. Take them out of the oven Just let them cool for about 15-20 mins on the baking sheets.
Combine the powdered sugar, lemon juice, honey,and lemon zest in a small bowl and stir until smooth. Spoon about ½ tsp onto each cookie and use the back of the spoon to gently spread. Let the glaze harden for about 2 hours.
After Thoughts
- With the Icing it really does pay not to be lazy and sieve the icing sugar to avoid those nasty little lumps in your icing.


No comments:
Post a Comment